
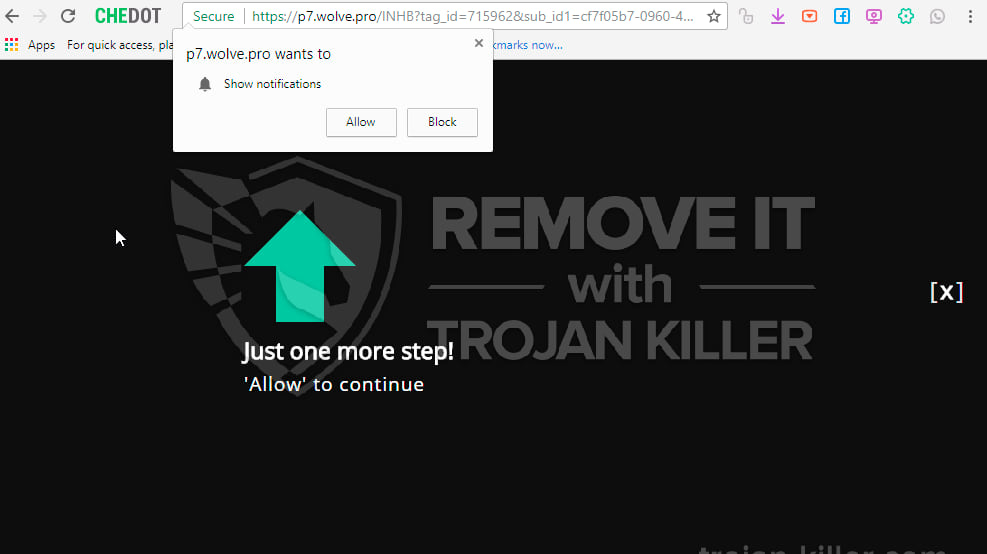
P7.wolve.pro is a deceptive website that may suddenly begin its malicious performance in your browser. Note that these problems are specifically the issue for Google Chrome and Mozilla Firefox. When you discover P7.wolve.pro pop-ups in your screen you should definitely stay away from interacting with them! Read the rest of the guide and you will find out why exactly these pop-ups are dangerous and what needs to be done to get your system fixed.
 P7.wolve.pro
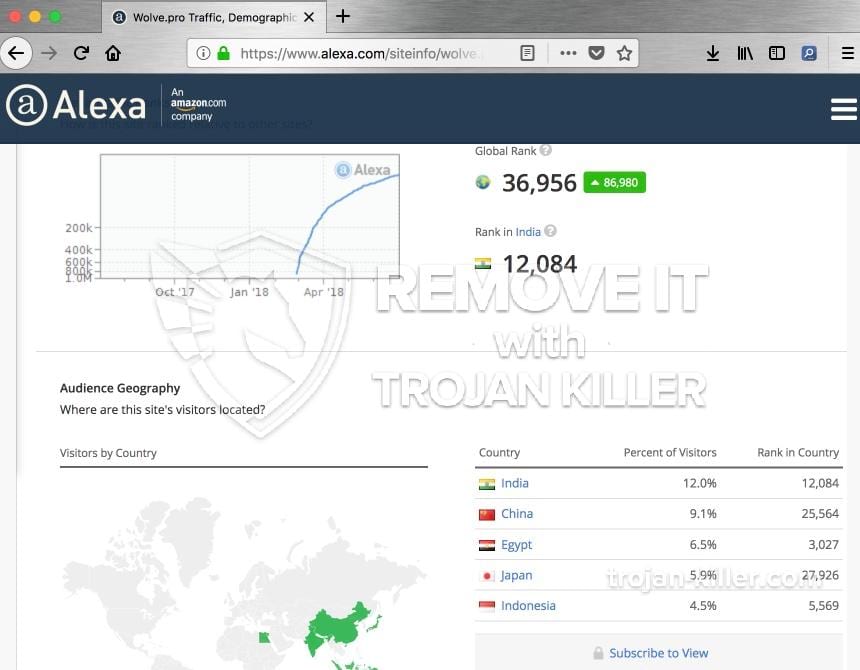
P7.wolve.pro takes place on the computers with low level of protection. Most likely, you use Google Chrome or Mozilla Firefox which are the most targeted Internet browsers among hackers these days. It is obvious that to surf the Internet when irritating pop-ups are here is impossible. Alerts appear in the upper-right hand corner of the browser where they really disturb Web visitors. We just want to check whether you do everything correctly to solve the problem with P7.wolve.pro and not only. Be conscious about your security decisions, make sure you do everything properly and do not ignore appeared pop-ups. Try to download the latest security updates to keep your antivirus sensitive to the new computer threats. Regular scanning also means a lot if to say about primary defense of the own computer. Stay away from suspicious emails with unknown URLs as well as spam emails. Most likely, your PC could be infected via e-mail.
The main reason why you see P7.wolve.pro pop-ups is because your PC and your browser in particular are messed up by adware. There could be some suspicious program that would be running in the background. However, trying to delete it manually might not give you any positive outcome, so P7.wolve.pro pop-ups will keep troubling your surfing. Alternatively, some adware could be formalized as certain add-on (extension) in your browser that would produce such alerts. In any case, there is a problem with your system that needs to be immediately fixed.
 P7.wolve.pro
P7.wolve.pro pop-ups can be only deleted after the adware is eliminated fully from the system. For this goal we strongly advise that you scan the workstation with a reliable security software tailored to relieve your PC from adware/malware aggression. You will be able to reset your browsers using its built-in tool and thus avoid P7.wolve.pro pop-ups from performing their show in your screen permanently.
Follow the steps in the slider explaining how to use GridinSoft Anti-Malware.
- Step 1. Download GridinSoft Anti-Malware. Click on its installer in the left-bottom section of your browser.
- Step 2. Allow changes to be made via User Account Control.
- Step 3. Click on “Install” to install the program.
- Step 4. Wait until the program is fully installed into your PC.
- Step 5. Click on “Finish“.
- Step 6. Run the program. Wait until scanning is completed and all malware is detected.
- Step 7. Click on “Clean Now“.
- Step 8. Select the license type and purchase the program. Remove all identified threats with purchased version of the software.
- Step 9. Shut down all your browsers. In GridinSoft Anti-Malware, click on “Tools“, then select “Reset browsers settings” option.
- Step 10. Select browsers you want to be automatically reset and appropriate reset options, then click on “Reset“.
- Step 11. Click on “Protect“. Make sure that Internet Security mode is enabled.
Tips to remove P7.wolve.pro manually from your PC.
STEP 1. Uninstalling unwanted software regularly (via the Control Panel).
- Right-click on Windows logo in the bottom-left section of the screen, then select “Control Panel“:
- In “Programs” section, click on “Uninstall a program“:
- Right-click on specific unwanted application, the select “Uninstall“:
- Right-click on Windows taskbar, then select “Task Manager“:
- Select specific task related to unwanted program, then right-click on it and choose the option “End Task“:
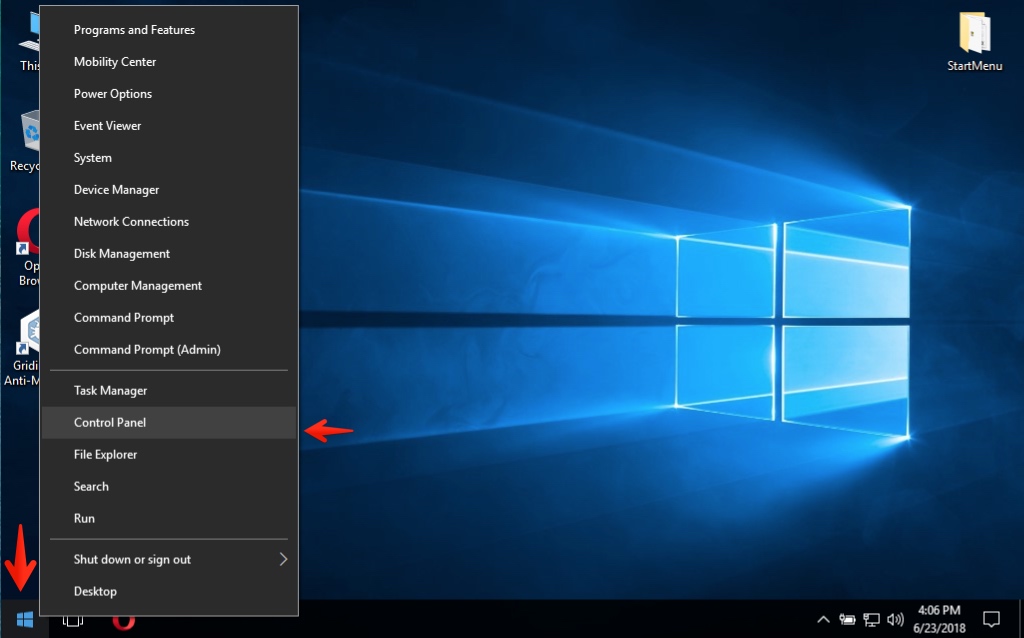 How to start Control Panel in Windows
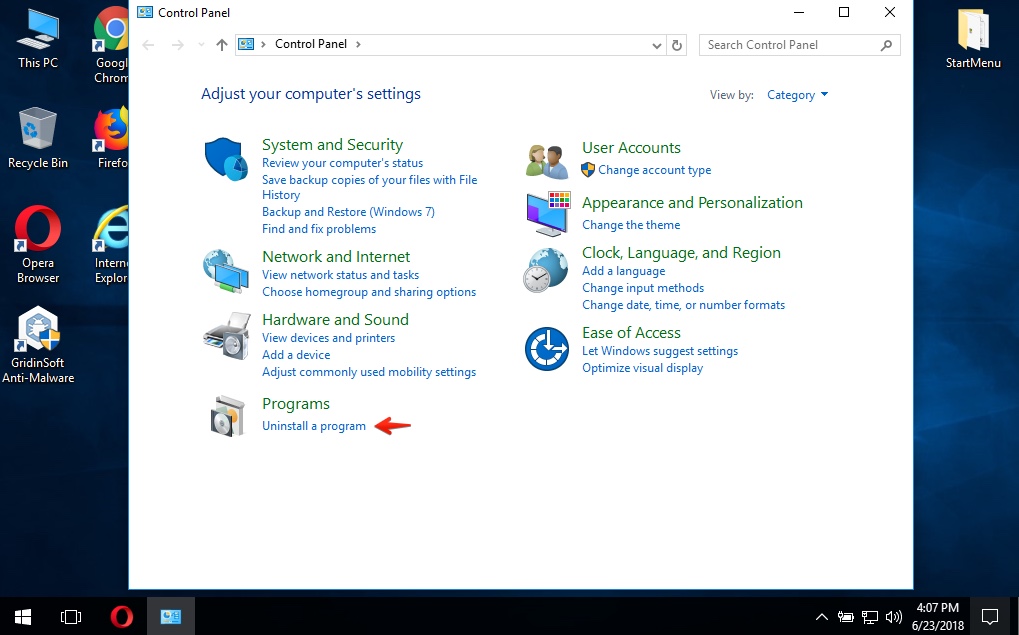 Control Panel – Uninstall a program
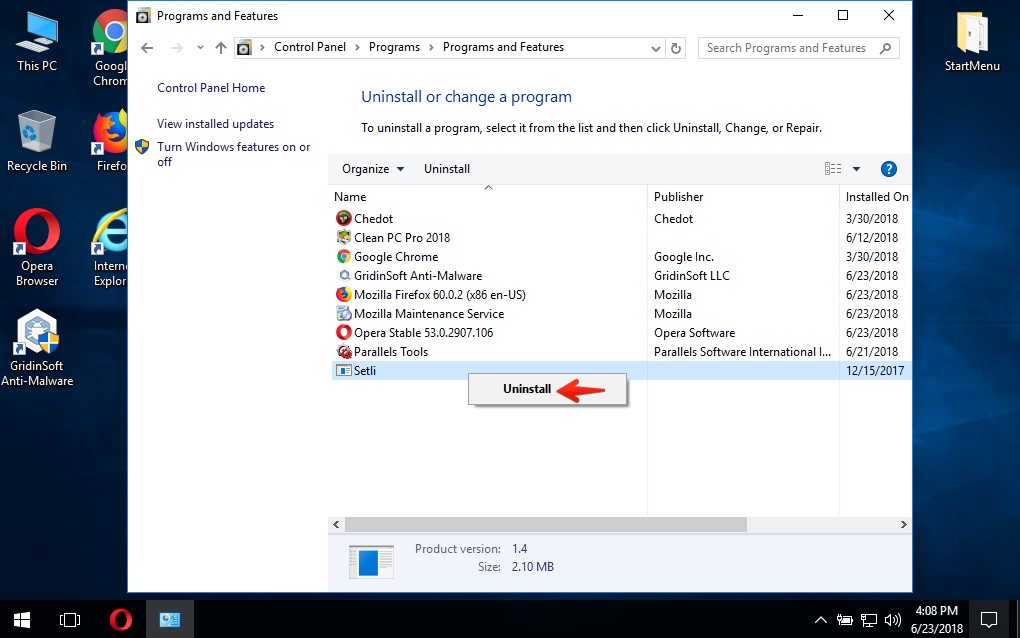 How to uninstall a program in Windows
Warning! Some unwanted programs may be active (running) while you attempt to uninstall them. It might be necessary for you to end their task via the Task Manager application. Here is how you can do that:
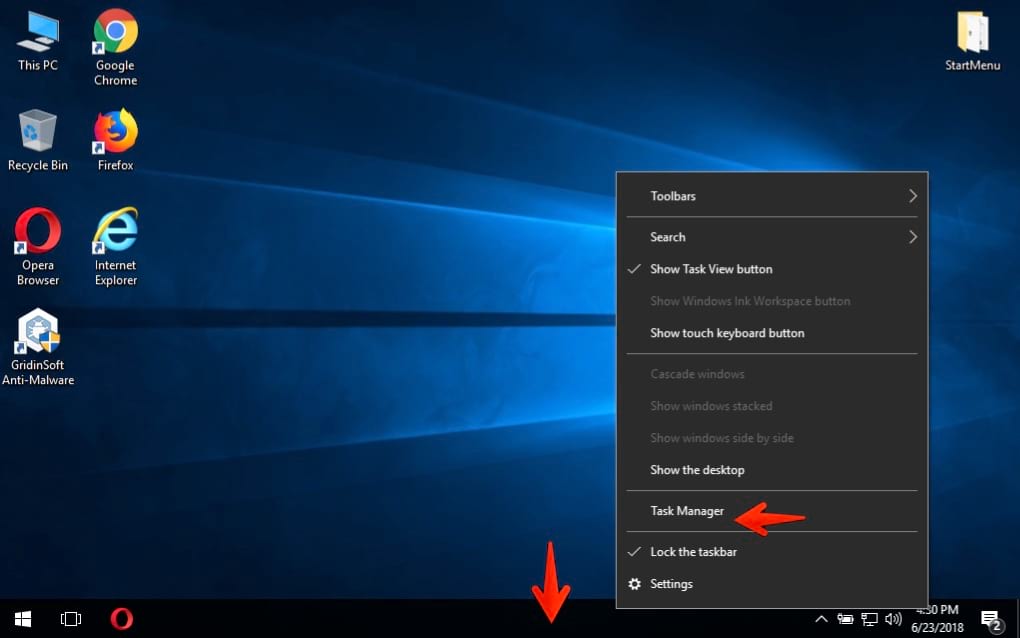 How to launch Task Manager
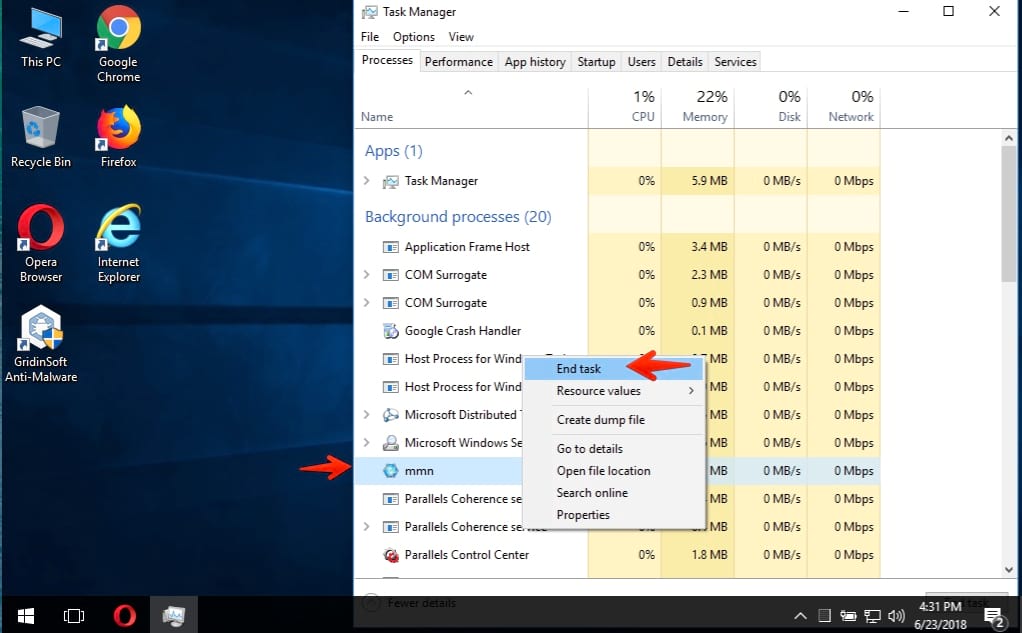 How to end task of specific program in Windows
Warning! Manual malware removal as described above is often a very time-consuming undertaking. It requires a lot of technical skills and does not guarantee absolute repair of your system. We recommend you to select our fully automatic solution to fix your PC on a professional basis.
STEP 2. Fixing your browser home page and search engine settings.
Instructions to fix Google Chrome home page and search engine settings manually.
- Click on Google Chrome menu in the form of three vertical dots, then select “Settings“:
- Scroll down through Google Chrome Settings until you reach “On Startup” section. Select “Open a specific page or set pages“. Find suspicious unwanted home page, then clock on “Remove“:
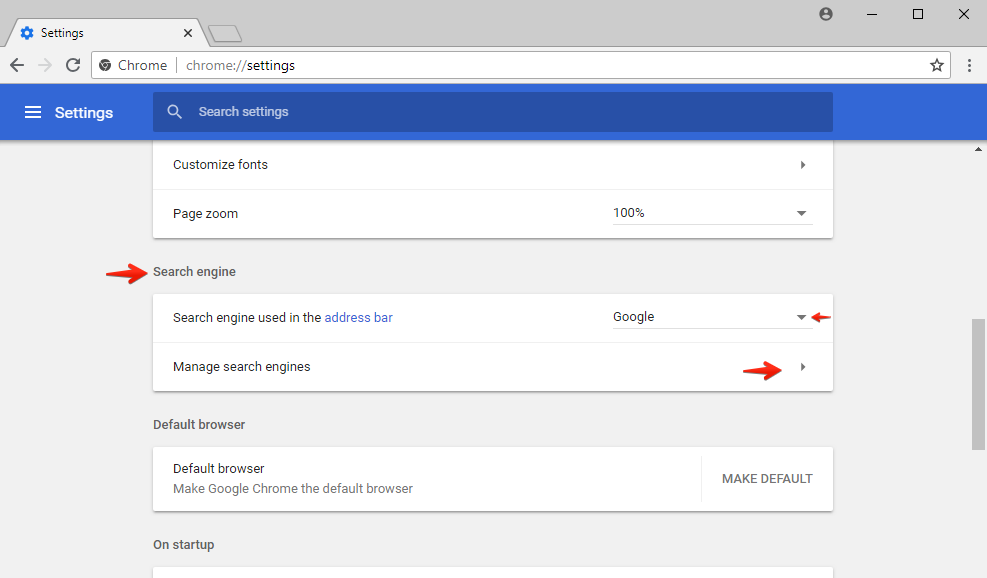
- In Google Chrome Settings find “Search Engine” section. Select your preferred search engine to be enabled if your search settings are messed up (amended) by adware or browser hijacker:
- Click on “Manage search engines“.
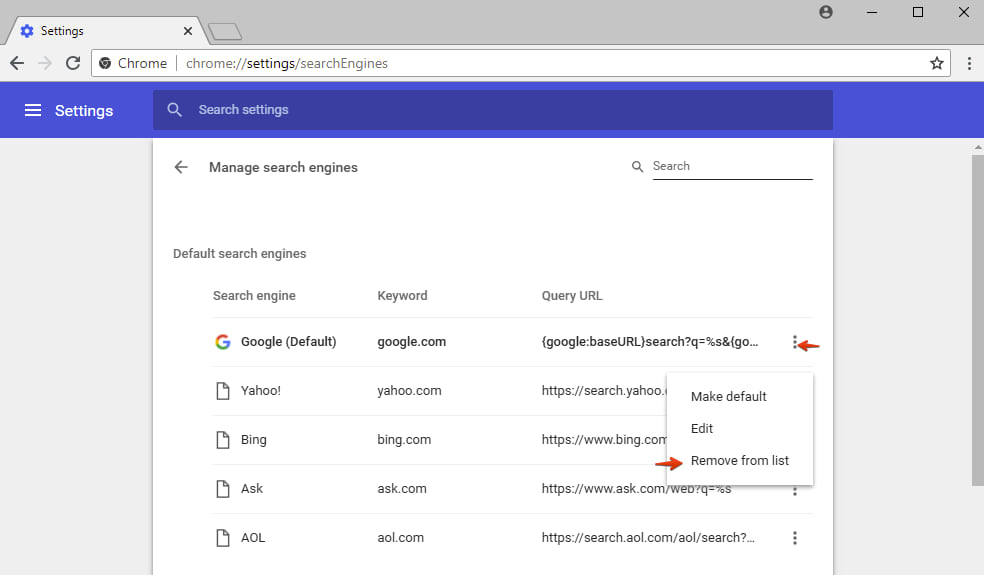
- Find specific search engine that you do not want to be your default one, then click on “Remove from list“:
 Google Chrome Settings
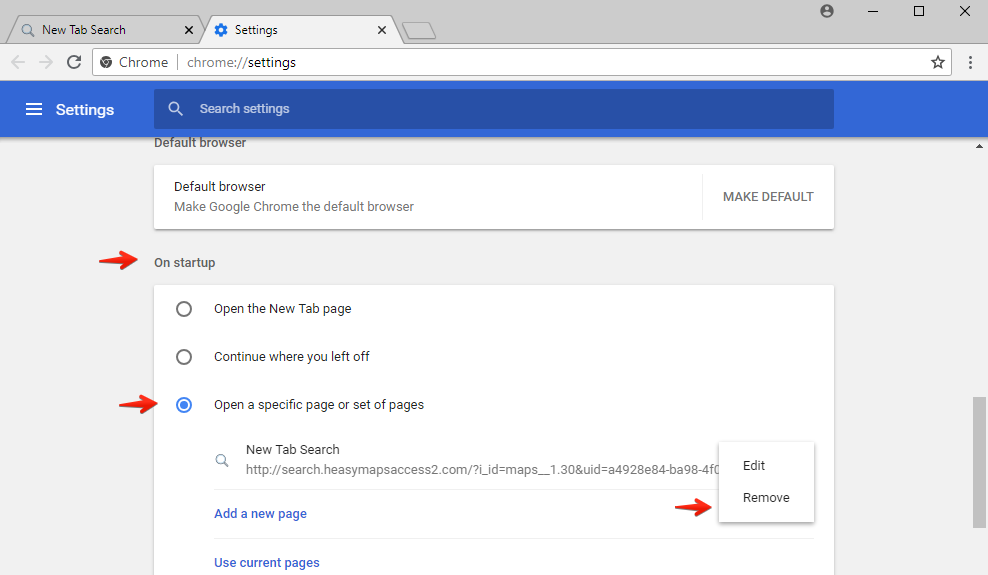 Google Chrome – Set Pages
 Google Chrome Search Engine parameters
 Removing unwanted search engine from Google Chrome list
Instructions to restore Mozilla Firefox home page and search engine settings manually.
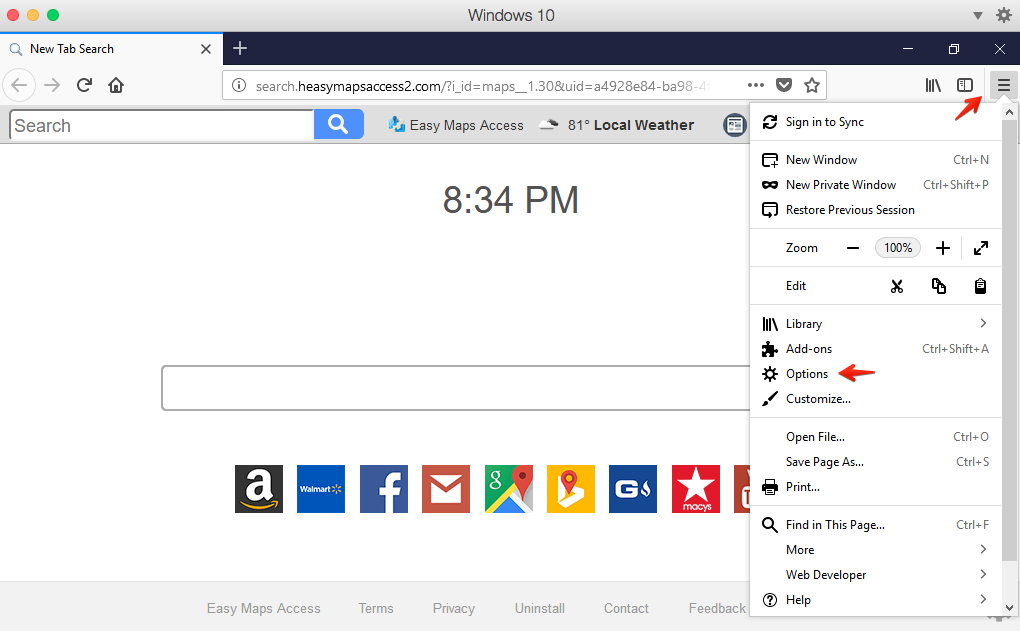
- In Mozilla Firefox, click on its menu in the form of three horizontal lines, then select “Options“:
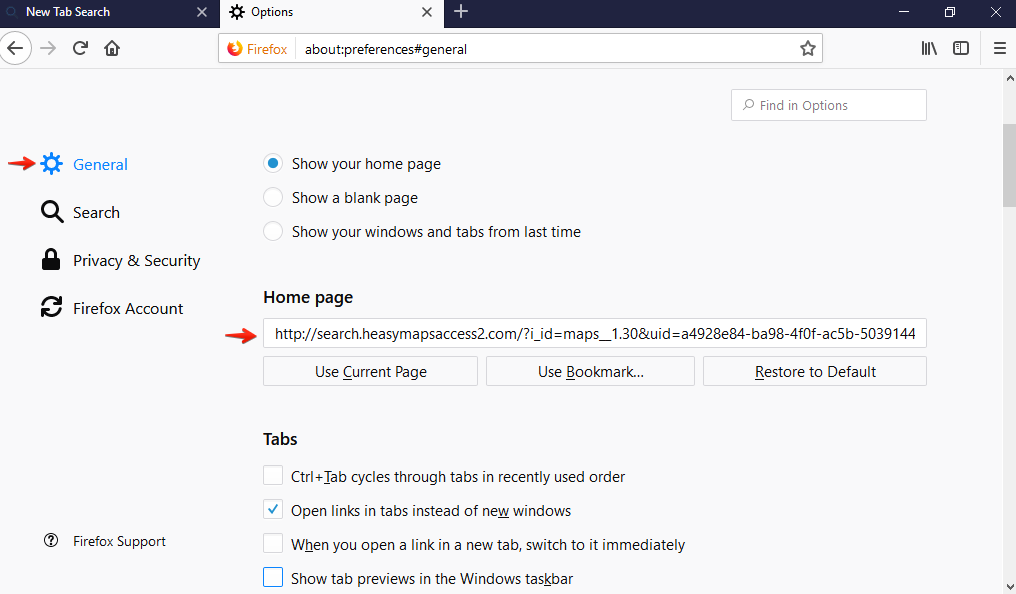
- In “General” section, check home page settings. Remove unwanted parameters, or click on “Restore to Default“:
- In the “Search” section of Mozilla Firefox, select your preferred search engine:
- You may as well remove unwanted search engine completely from Mozilla Firefox by clicking on the “Remove” button next to it:
 Mozilla Firefox options
 Mozilla Firefox home page settings
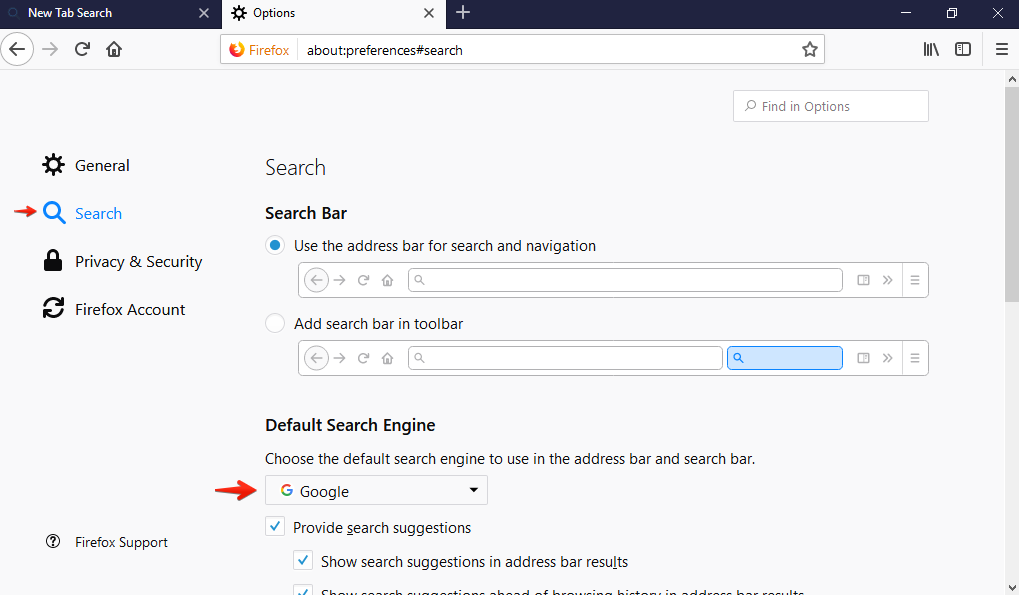 Search engine selection in Mozilla Firefox
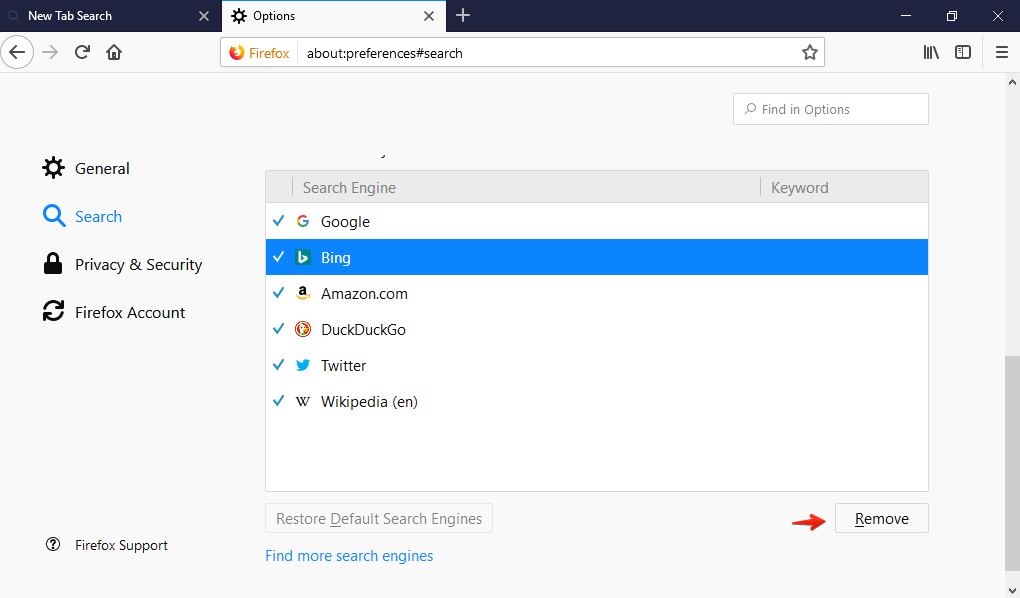 Removing unwanted search engine from Mozilla Firefox
Instructions to repair Internet Explorer home page and search engine settings manually.
- In Internet Explorer, click on its settings menu in the form of a gear-wheel, then select “Internet Options“:
- Click on the “General” tab, then check home page settings. Remove unwanted home page from the field, or click on “Use new tab“. Click on “Apply” to save changes:
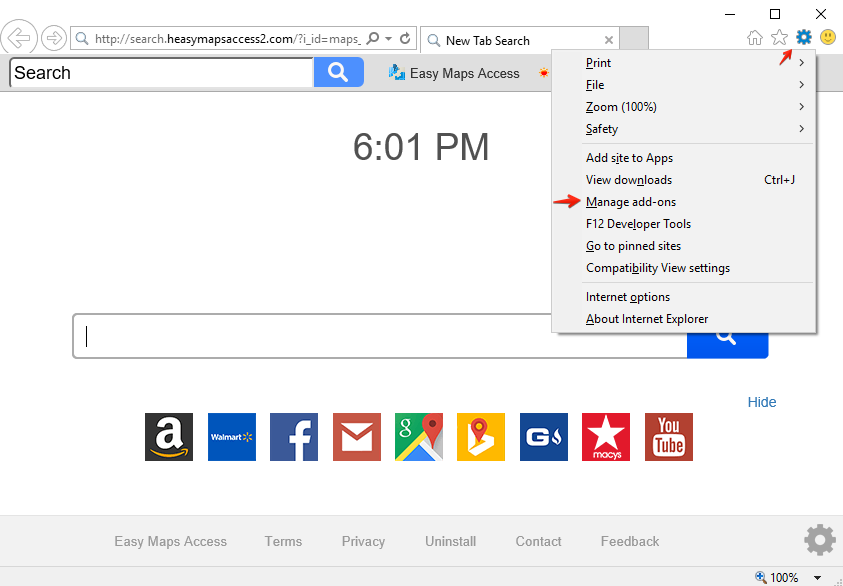
- In Internet Explorer, click on its settings menu in the form of a gear-wheel, then select “Manage add-ons“:
- Click on “Search Providers“, then select unwanted search engine and click on “Remove” button related to it:
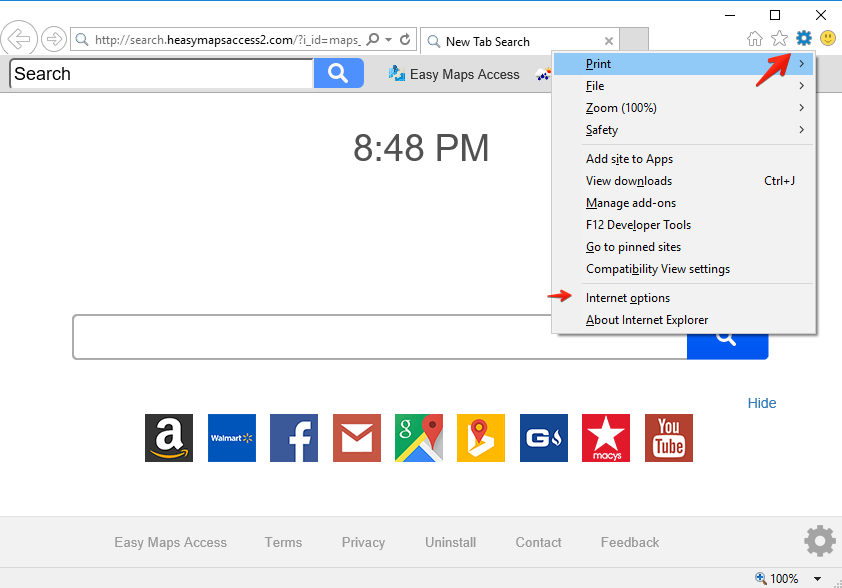 Internet Explorer options
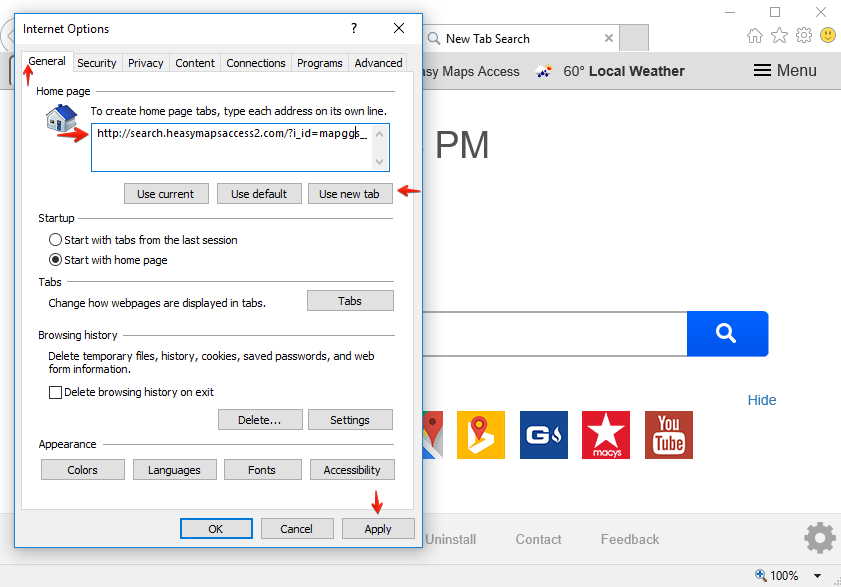 Internet Explorer home page settings
 Managing add-ons of Internet Explorer
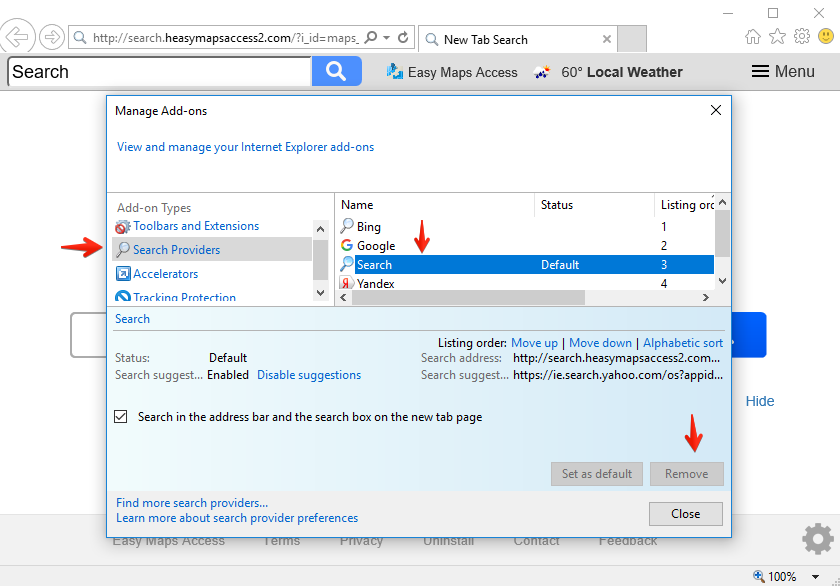 Internet Explorer – Search Providers
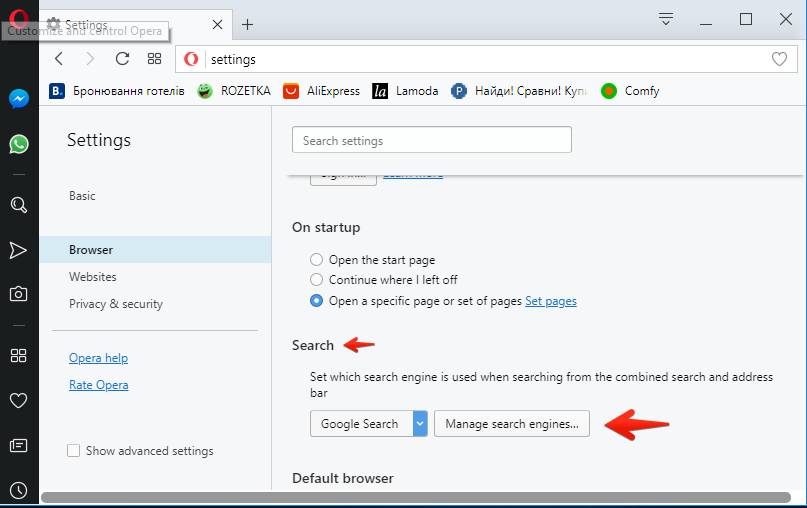
Instructions to change Opera home page and search engine settings manually.
- Click on Opera menu in the form of “Opera” button, then select “Settings“:
- Click on “Browser” section, then select “Set pages“:
- Find unwanted start page of Opera, then click on “X” next to it to remove it:
- In the “Search” section, click on “Manage search engines…“:
- Click on “Make default” to select your preferred default search engine, then click on “Done“:
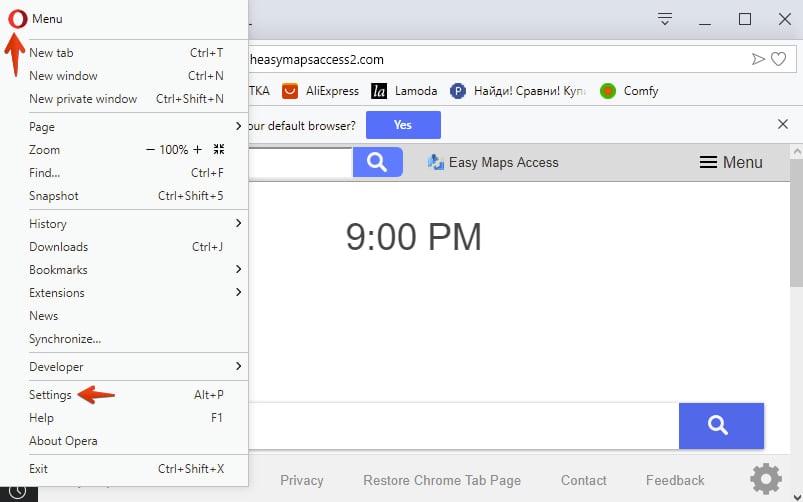 Opera settings
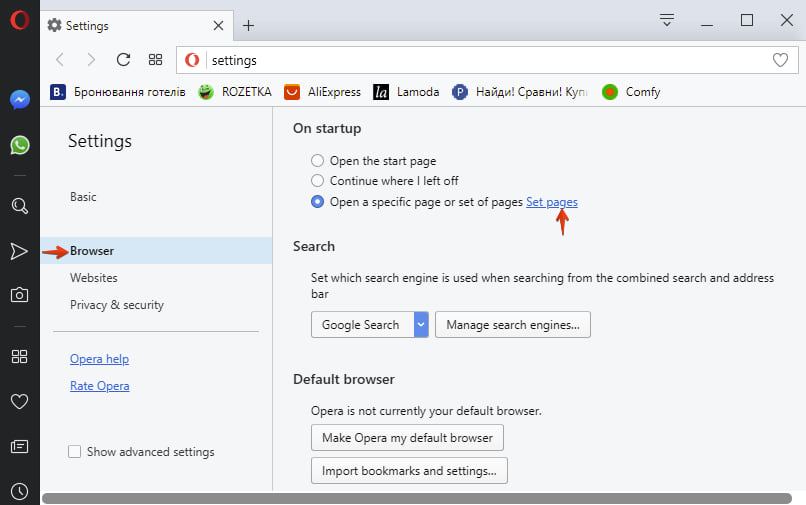 Opera – Set pages
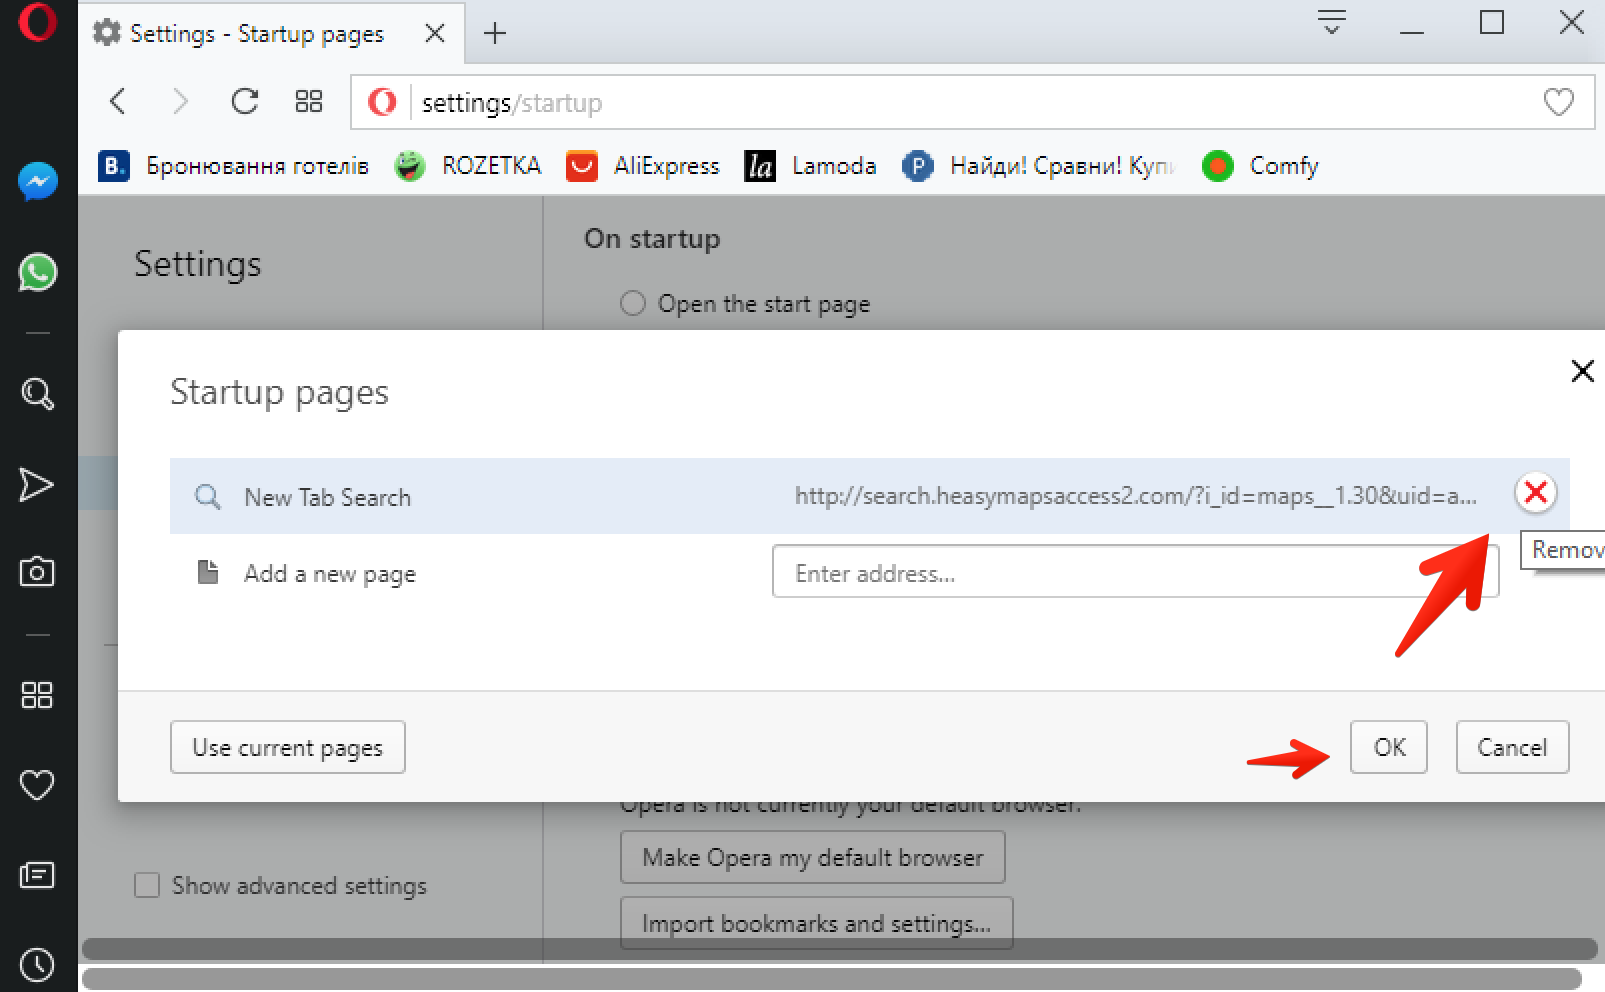 Opera startup pages
 Opera – Manage search engines
 Opera default search selection
STEP 3. Removing unwanted extensions from browsers.
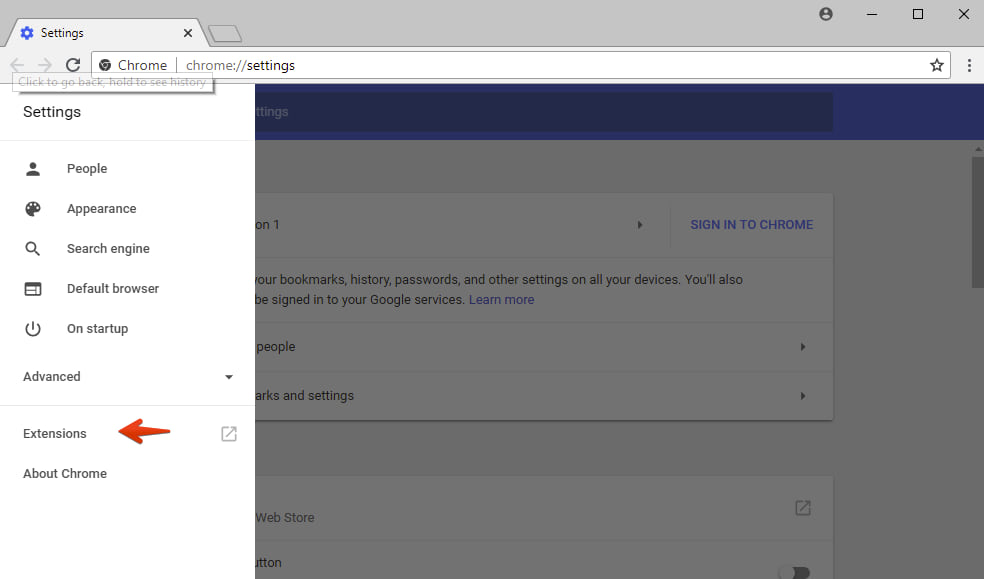
Deleting unwanted extensions from Google Chrome.
- Click on Google Chrome menu in the form of three vertical dots, then select “Settings“:
- Click on “Settings” in the left menu (in the form of three horizontal lines), then select “Extensions“:
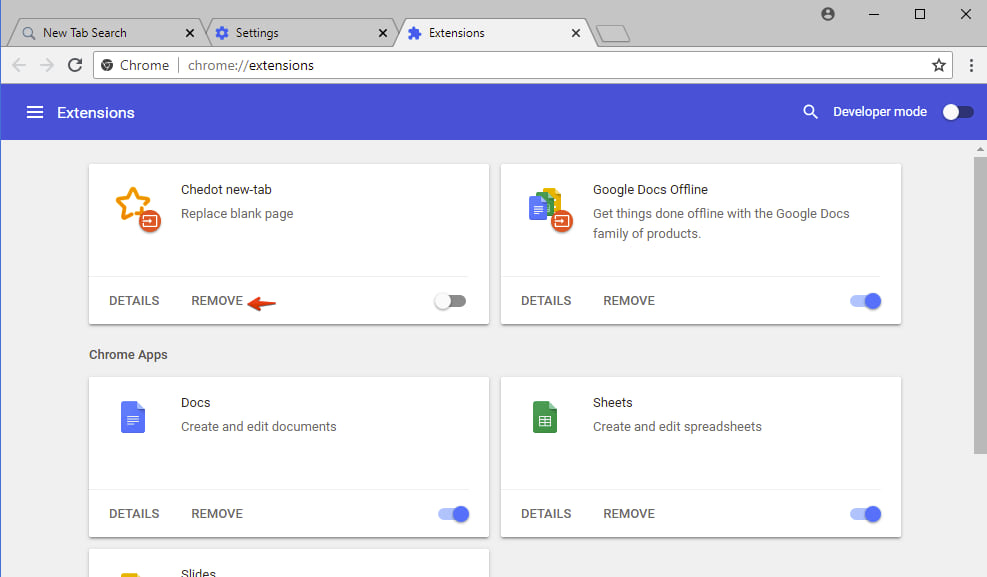
 Google Chrome extensions
 - Find unwanted extension, then click on “Remove” button next to it:
Google Chrome Settings
 Removing unwanted extension from Google Chrome
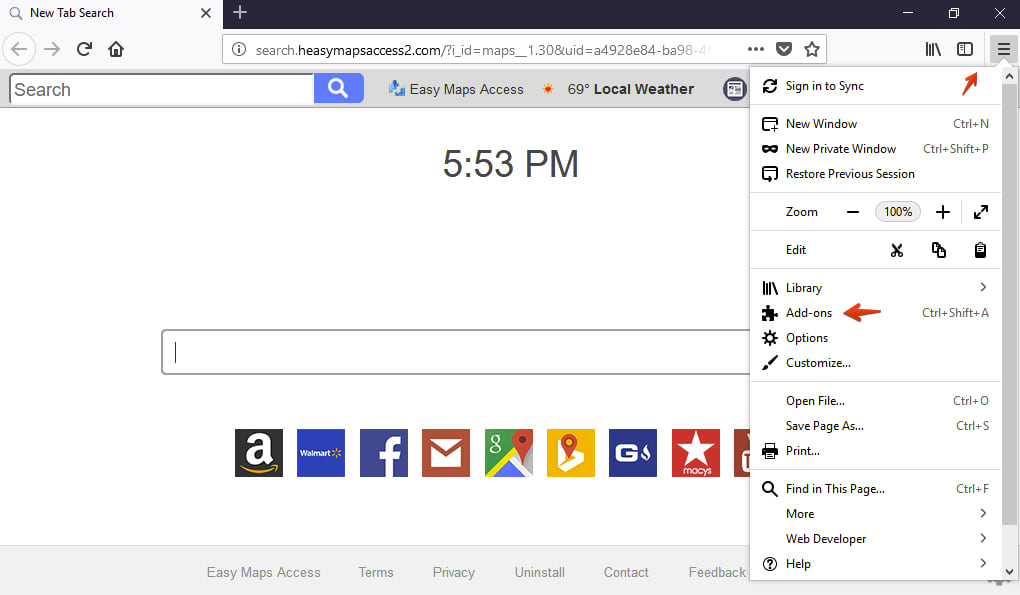
Removing unwanted add-ons from Mozilla Firefox.
- In Mozilla Firefox, click on its menu in the form of three horizontal lines, then select “Add-ons“:
- Click on the “Extensions” item. If you see suspicious add-ons, disable and then delete them:
 Accessing Mozilla Firefox add-ons
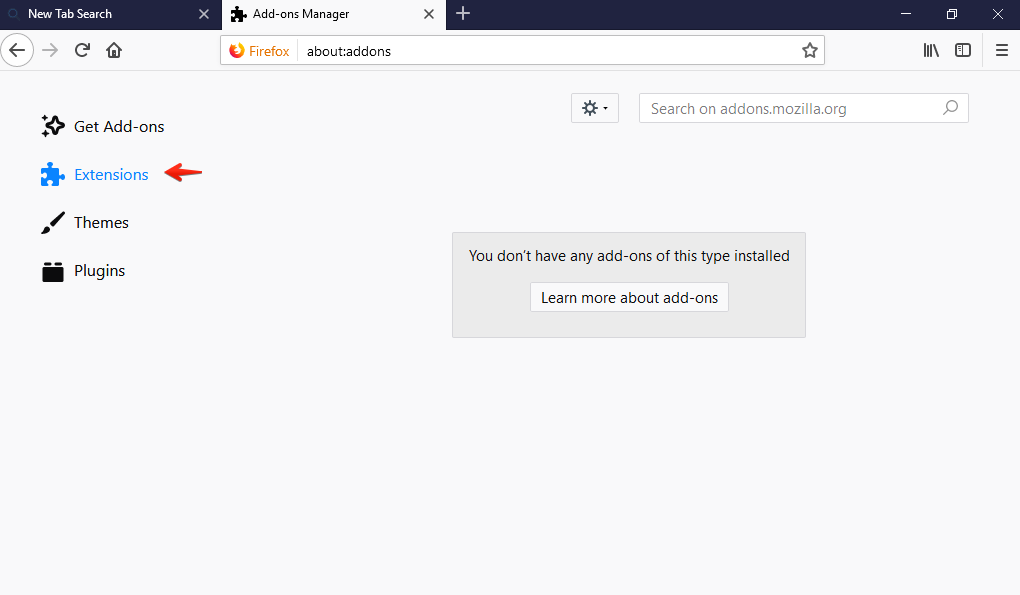 Removing suspicious extensions from Mozilla Firefox
Getting rid of unwanted addons from Internet Explorer.
- In Internet Explorer, click on its settings menu in the form of a gear-wheel, then select “Manage add-ons“:
- In the section called “Toolbars and Extensions“, find specific unwanted add-on, then click on “Disable” button related to it:
 Managing add-ons within Internet Explorer
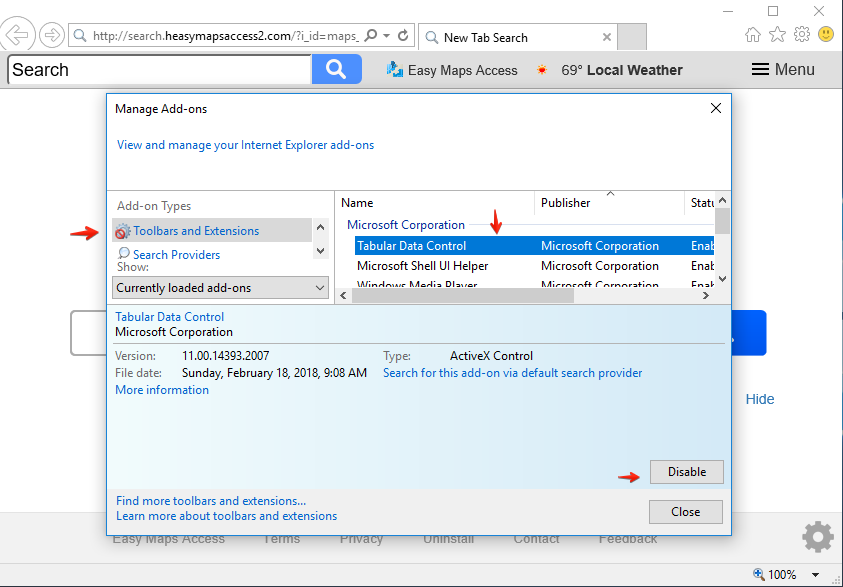 Disabling unwanted add-on in Internet Explorer
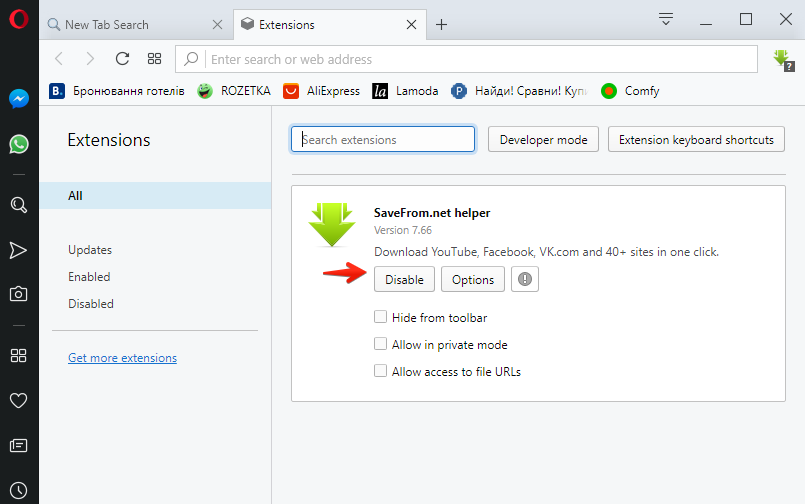
Cleaning unwanted extensions from Opera.
- Click on Opera menu in the form of “Opera” button, then select “Extensions“:
- Find specific unwanted extension, then click on “Disable” button associated with it:
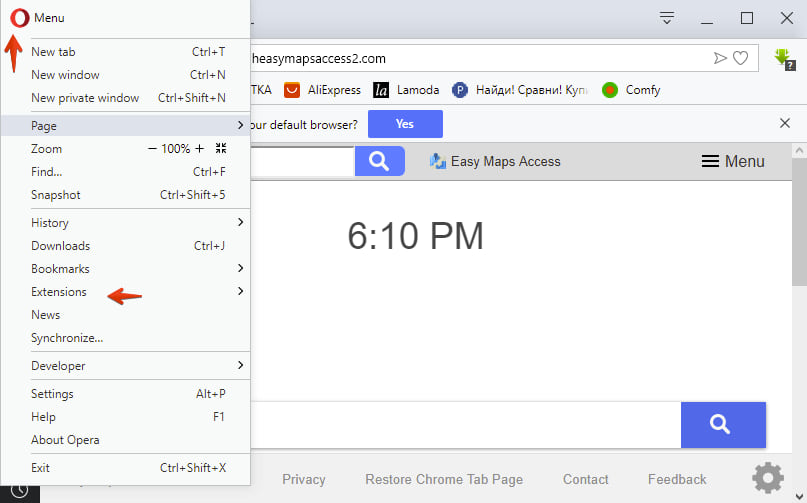 Accessing Opera extensions
 How to disable extensions in Opera
STEP 4. Disabling push notifications from browsers.
Disabling push notifications from Google Chrome.
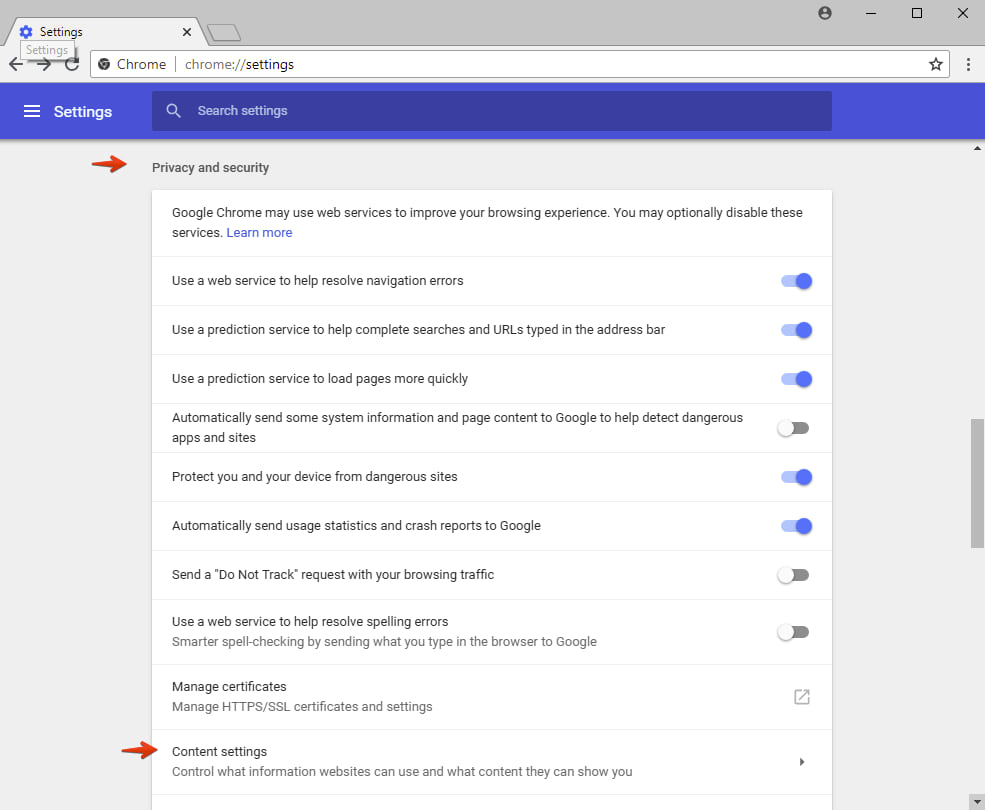
- Click on Google Chrome menu in the form of three vertical dots, then select “Settings“:
- Scroll down to the bottom of the page, then click on “Advanced“:
- In “Privacy and Security” section, click on “Content Settings“:
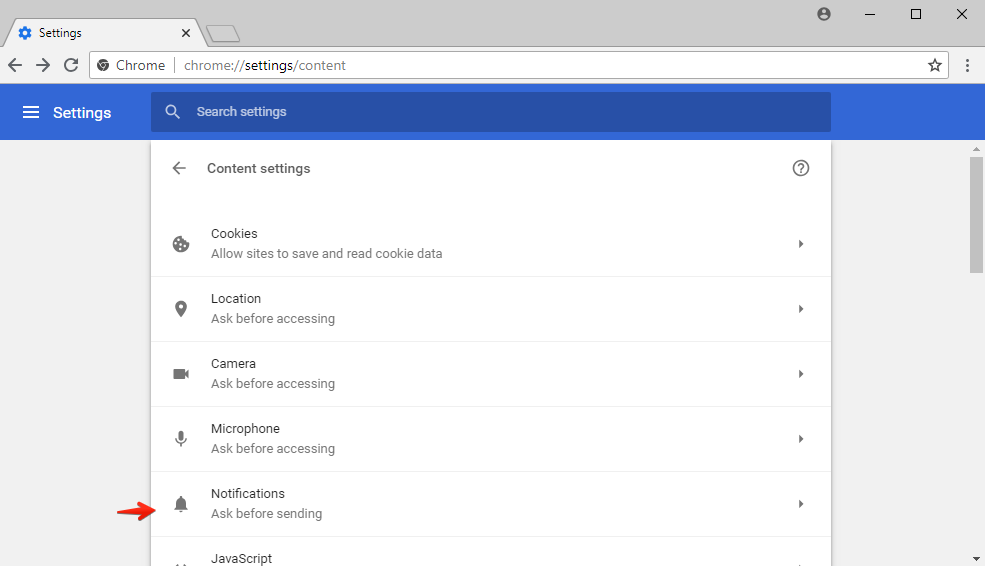
- Click on “Notifications“:
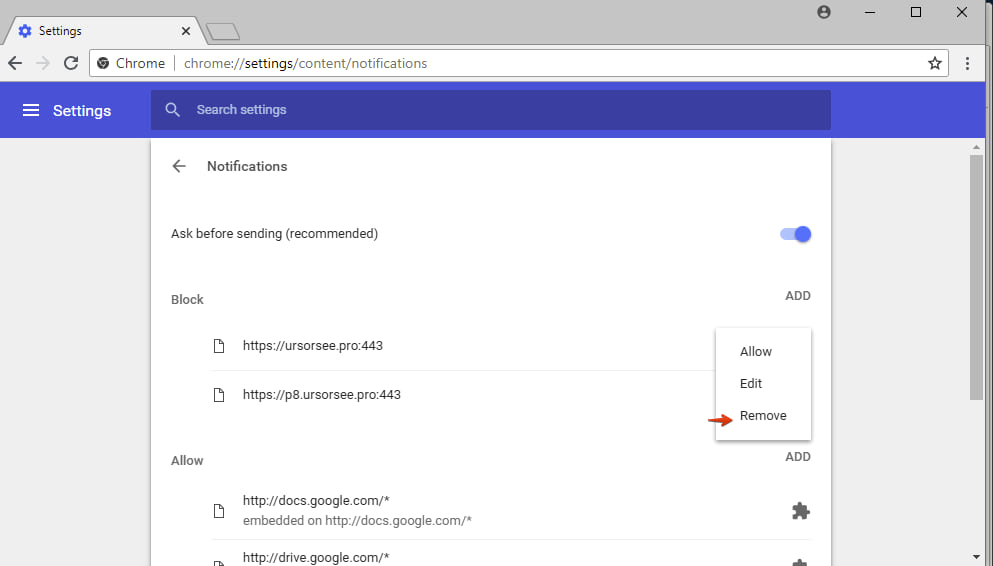
- Find specific site that is displaying unwanted push notifications, click on its options in the form of three vertical dots, then click on “Remove“:
Google Chrome Settings
 Advanced settings of Google Chrome browser.
 Google Chrome content settings
 Google Chrome notifications
 How to remove unwanted push notifications from Google Chrome.
Disabling push notifications from Mozilla Firefox.
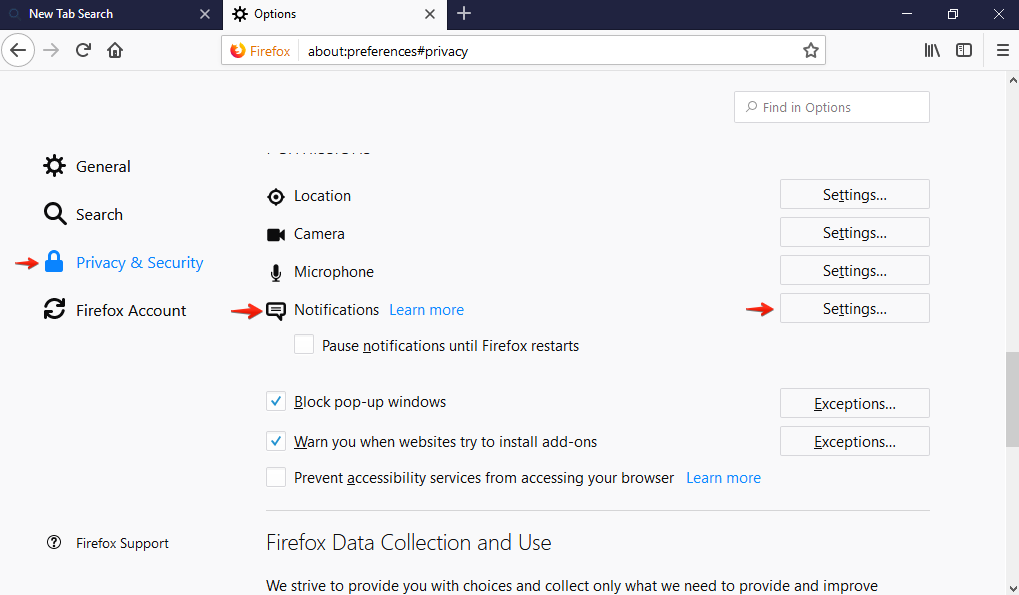
- In Mozilla Firefox, click on its menu in the form of three horizontal lines, then select “Options“:
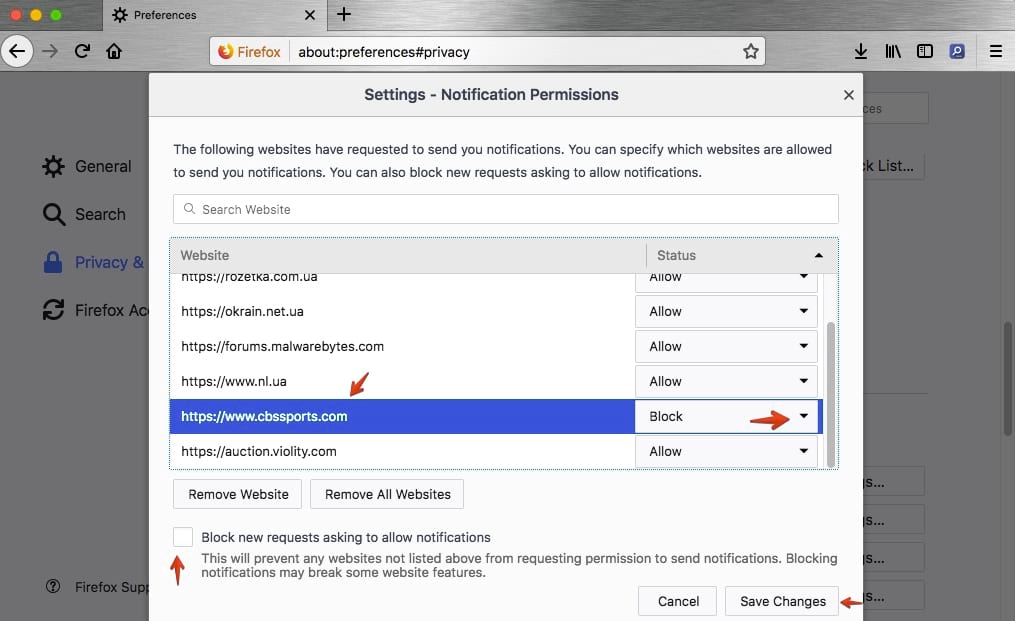
- Scroll down to “Privacy & Security” section, then find “Notifications“, click on “Settings” button related to it:
- Find unwanted sites that keep displaying unwanted notifications, then change the status from “Allow” to “Block“. Additionally, check the box “Block new requests asking to allow notifications“. Then click on “Save changes“:
Mozilla Firefox options
 Mozilla Firefox notifications
 How to block unwanted notifications in Mozilla Firefox
STEP 5. Full reset of browsers either manually or automatically (video guides).
Important notice! Trying to fix your browsers manually after malware attack is definitely not easy, requires more skills and time, even with detailed description as above. We recommend you to try our absolutely free feature provided by GridinSoft Anti-Malware to reset your browsers automatically within just a couple of mouse clicks!